Best cookies ever

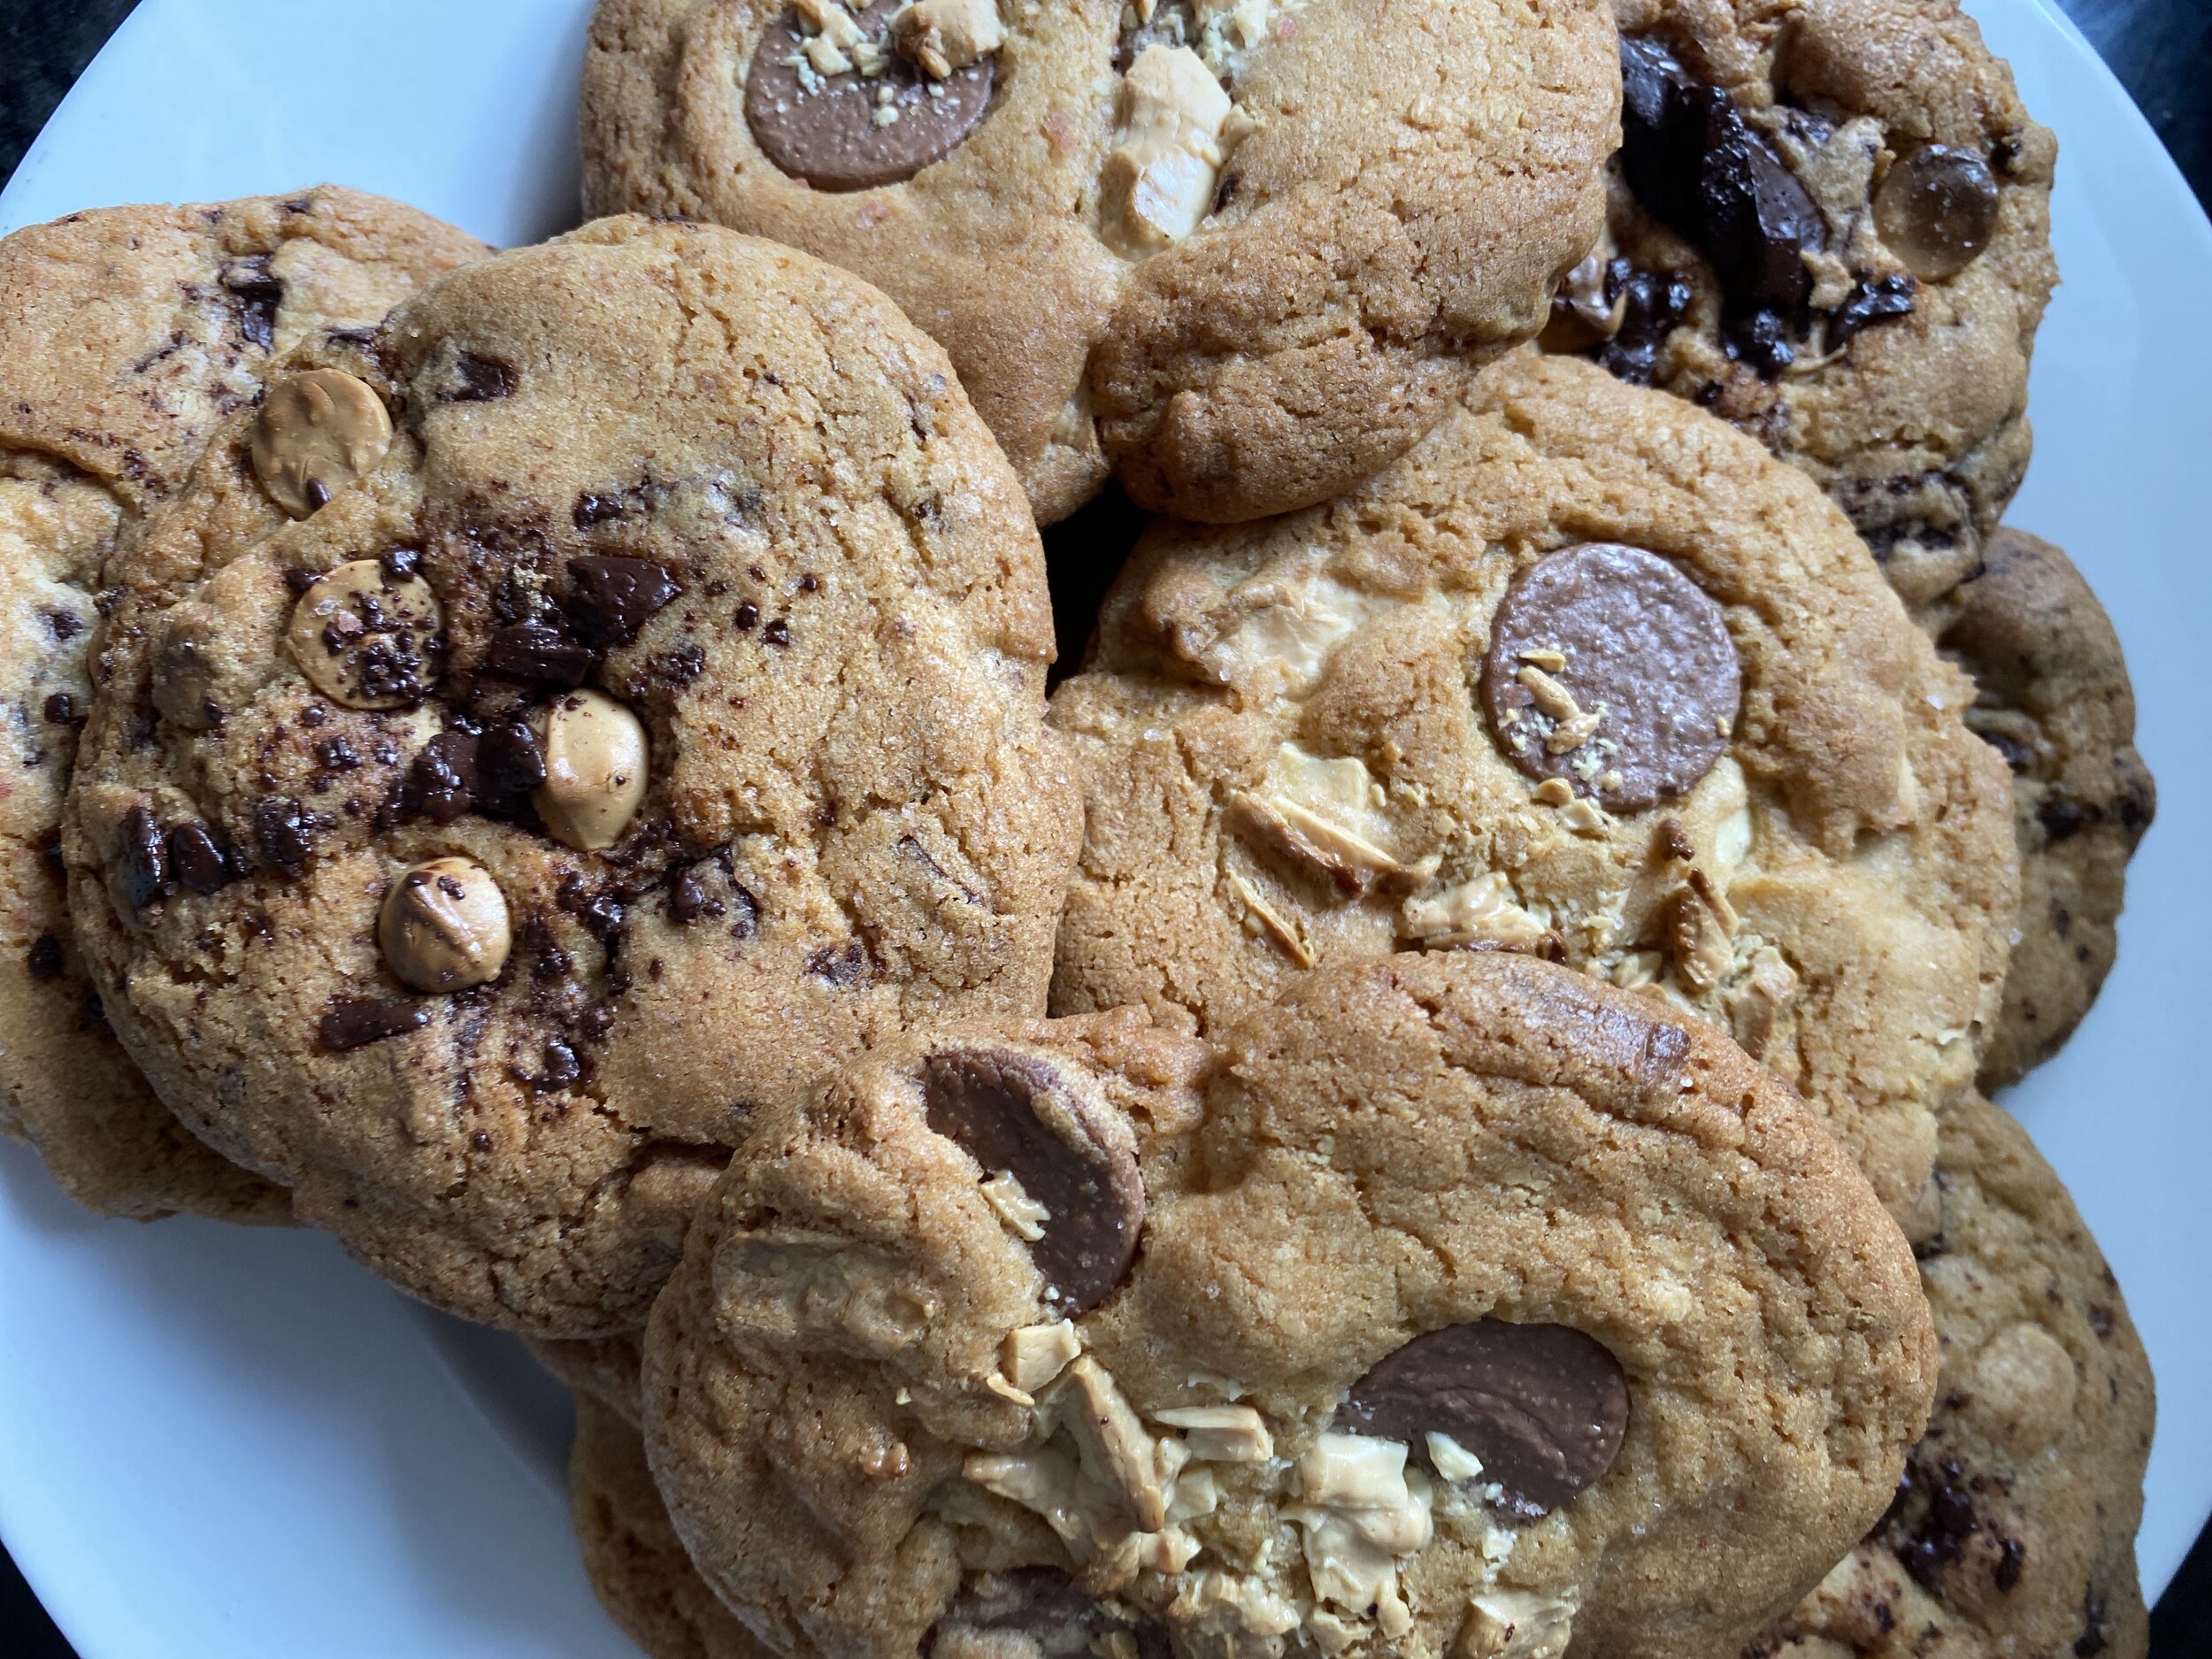
So I realise my last recipe post was last lockdown! Lockdowns get me baking more than ever and this time it has been my mission to create the best chocolate chip cookies! This is about batch 7 and I’ll be honest some were better than others! I have finally figured out a few tricks. I was going to keep them to myself and create a cookie empire mwahahaha but thats not really my vibe, so instead I will share these tips so you can share the joy that delicious cookies bring. You have my permission to go ahead and put some Duck Island ice cream in between (the consistency is best) might i suggest salted caramel, but really go crazy try out a few and let me know your favourite combo.

Now I love dark chocolate so I did half dark and caramel, and half milk and white for my daughter. You could add nuts and get creative too!

IMG_4415.JPG


Ingredients

for 12 cookies

  • ½ cup caster sugar (100 g)

  • ¾ cup brown sugar (165 g), packed

  • 1 teaspoon salt

  • ½ cup unsalted butter(115 g), melted

  • 1 egg

  • 1 teaspoon vanilla extract

  • 1 ¼ cups plain flour (155 g) (if you can find any! This stuff is like gold right now!)

  • ½ teaspoon baking soda

  • Caramilk, milk or white chocolate chunks (110 g) I used Whittakers white or Donovans salted caramel drops

  • Dark chocolate chunk (110 g), I used Whittakers dark Ghana


Method

  1. Put on a happy playlist the cookies receive your good vibes!

  2. In a large bowl, whisk together the sugars, salt, and butter until a paste forms with no lumps.

  3. Whisk in the egg and vanilla, beating until light ribbons fall off the whisk and remain for a short while before falling back into the mixture, the mixture will change to a nice creamy colour too.

  4. Sift in the flour and baking soda, then fold the mixture with a spatula

    *Be careful not to overmix at this point, this is what causes the gluten in the flour to toughen resulting in cakier cookies.

  5. Fold in the chocolate chunks then scoop the dough with an ice-cream scoop or your hands roll into balls and then chill the dough for at least 30 minutes.

    * This is key for a more intense toffee-like flavour and deeper colour, chill the dough overnight. The longer the dough rests, the more complex its flavor will be.

  6. Preheat oven to 180°C. Line a baking sheet with baking paper.

  7. Put cookie balls onto a baking paper-lined baking sheet, pressing evenly down to flatten out leaving at least 10 cm of space between cookies and 5 cm of space from the edges of the pan so that the cookies can spread evenly.

  8. Crack some himalayan salt on top and press a few extra chocolate chunks in.

  9. Bake for 12-15 minutes, or until the edges have started to barely brown.

  10. Cool on the tray for that crispy outer yet gooey inner.

  11. Quality control essential so sneak one while still a little warm

  12. Enjoy!


Banana, raspberry & chocolate bread

Over herein NZ we are currently in lockdown season 2, this calls for more baking and home cooked meals right? Here’s my super simple banana, raspberry and chocolate bread, it’s sugar free apart from the chocolate!

IMG_5543%2B2.jpg

Ingredients

• butter or coconut oil 125g, melted

• very ripe bananas 3, mashed

• desiccated coconut 1 ½ cups

• ground almonds 1 cup

• flour (e.g. plain, spelt, gluten-free flour) ½ cup

• baking soda 1 level teaspoon

• vanilla essence or extract 2 teaspoons

• salt a good pinch

• free-range eggs 3, whisked

• chia seeds 1 tablespoon

• dark chocolate drops ½ cup

• frozen raspberries ¾ cup

• banana 1 extra, to garnish (optional)

• ground cinnamon 1 teaspoon


Method

1. Preheat oven to 180degC. Line loaf tin with baking paper.

2. In a large bowl, mix melted butter/oil, mashed banana, coconut, ground almonds, flour, baking soda, vanilla, salt and eggs, chia seeds, chocolate and cinnamon. Stir until combined.

3. Spoon 1/2 mixture into prepared loaf tin then press in 2/3 of the raspberries, cover with remaining mixture. Peel and cut remaining banana (if using) in half lengthways and arrange a banana half on top press remaining raspberries on top and sprinkle over extra chocolate drops and long strand coconut.

4. Bake for 35-40 minutes or until loaf is golden and a skewer inserted into the centre comes out clean.

5. Leave loaves to cool in tins for 5-10 minutes before removing and transferring to a wire rack. Very yummy slightly warmed and spread with butter! Store in an airtight container in a cool, dark place for up to three days, or in the fridge for up to five days. It also freezes well. Enjoy!

Common challenges in practice

Honestly I feel like I could set up a whole Instagram account of 'yoga hacks' with ways to approach common challenges when you get on the mat. With over 20 years of experience working with the human body, I've observed some common challenges that people face. These challenges can be frustrating and yes, we learn a lot from what frustrates us, but also a few yoga hacks can change your practice and help you to progress.

Our bodies are complex and fascinating, the body is so intelligent and the nervous system will opt to take the path of least resistance. While this might 'get the job done' in the moment it leads to creating patterns in the body that in the long term can lead to instability and injury due to poor form. So jump on your mat and learn a few little tips to empower you in your practice.

Watch the video here

What the squat?!

What the pose Malasana can tell you about your body

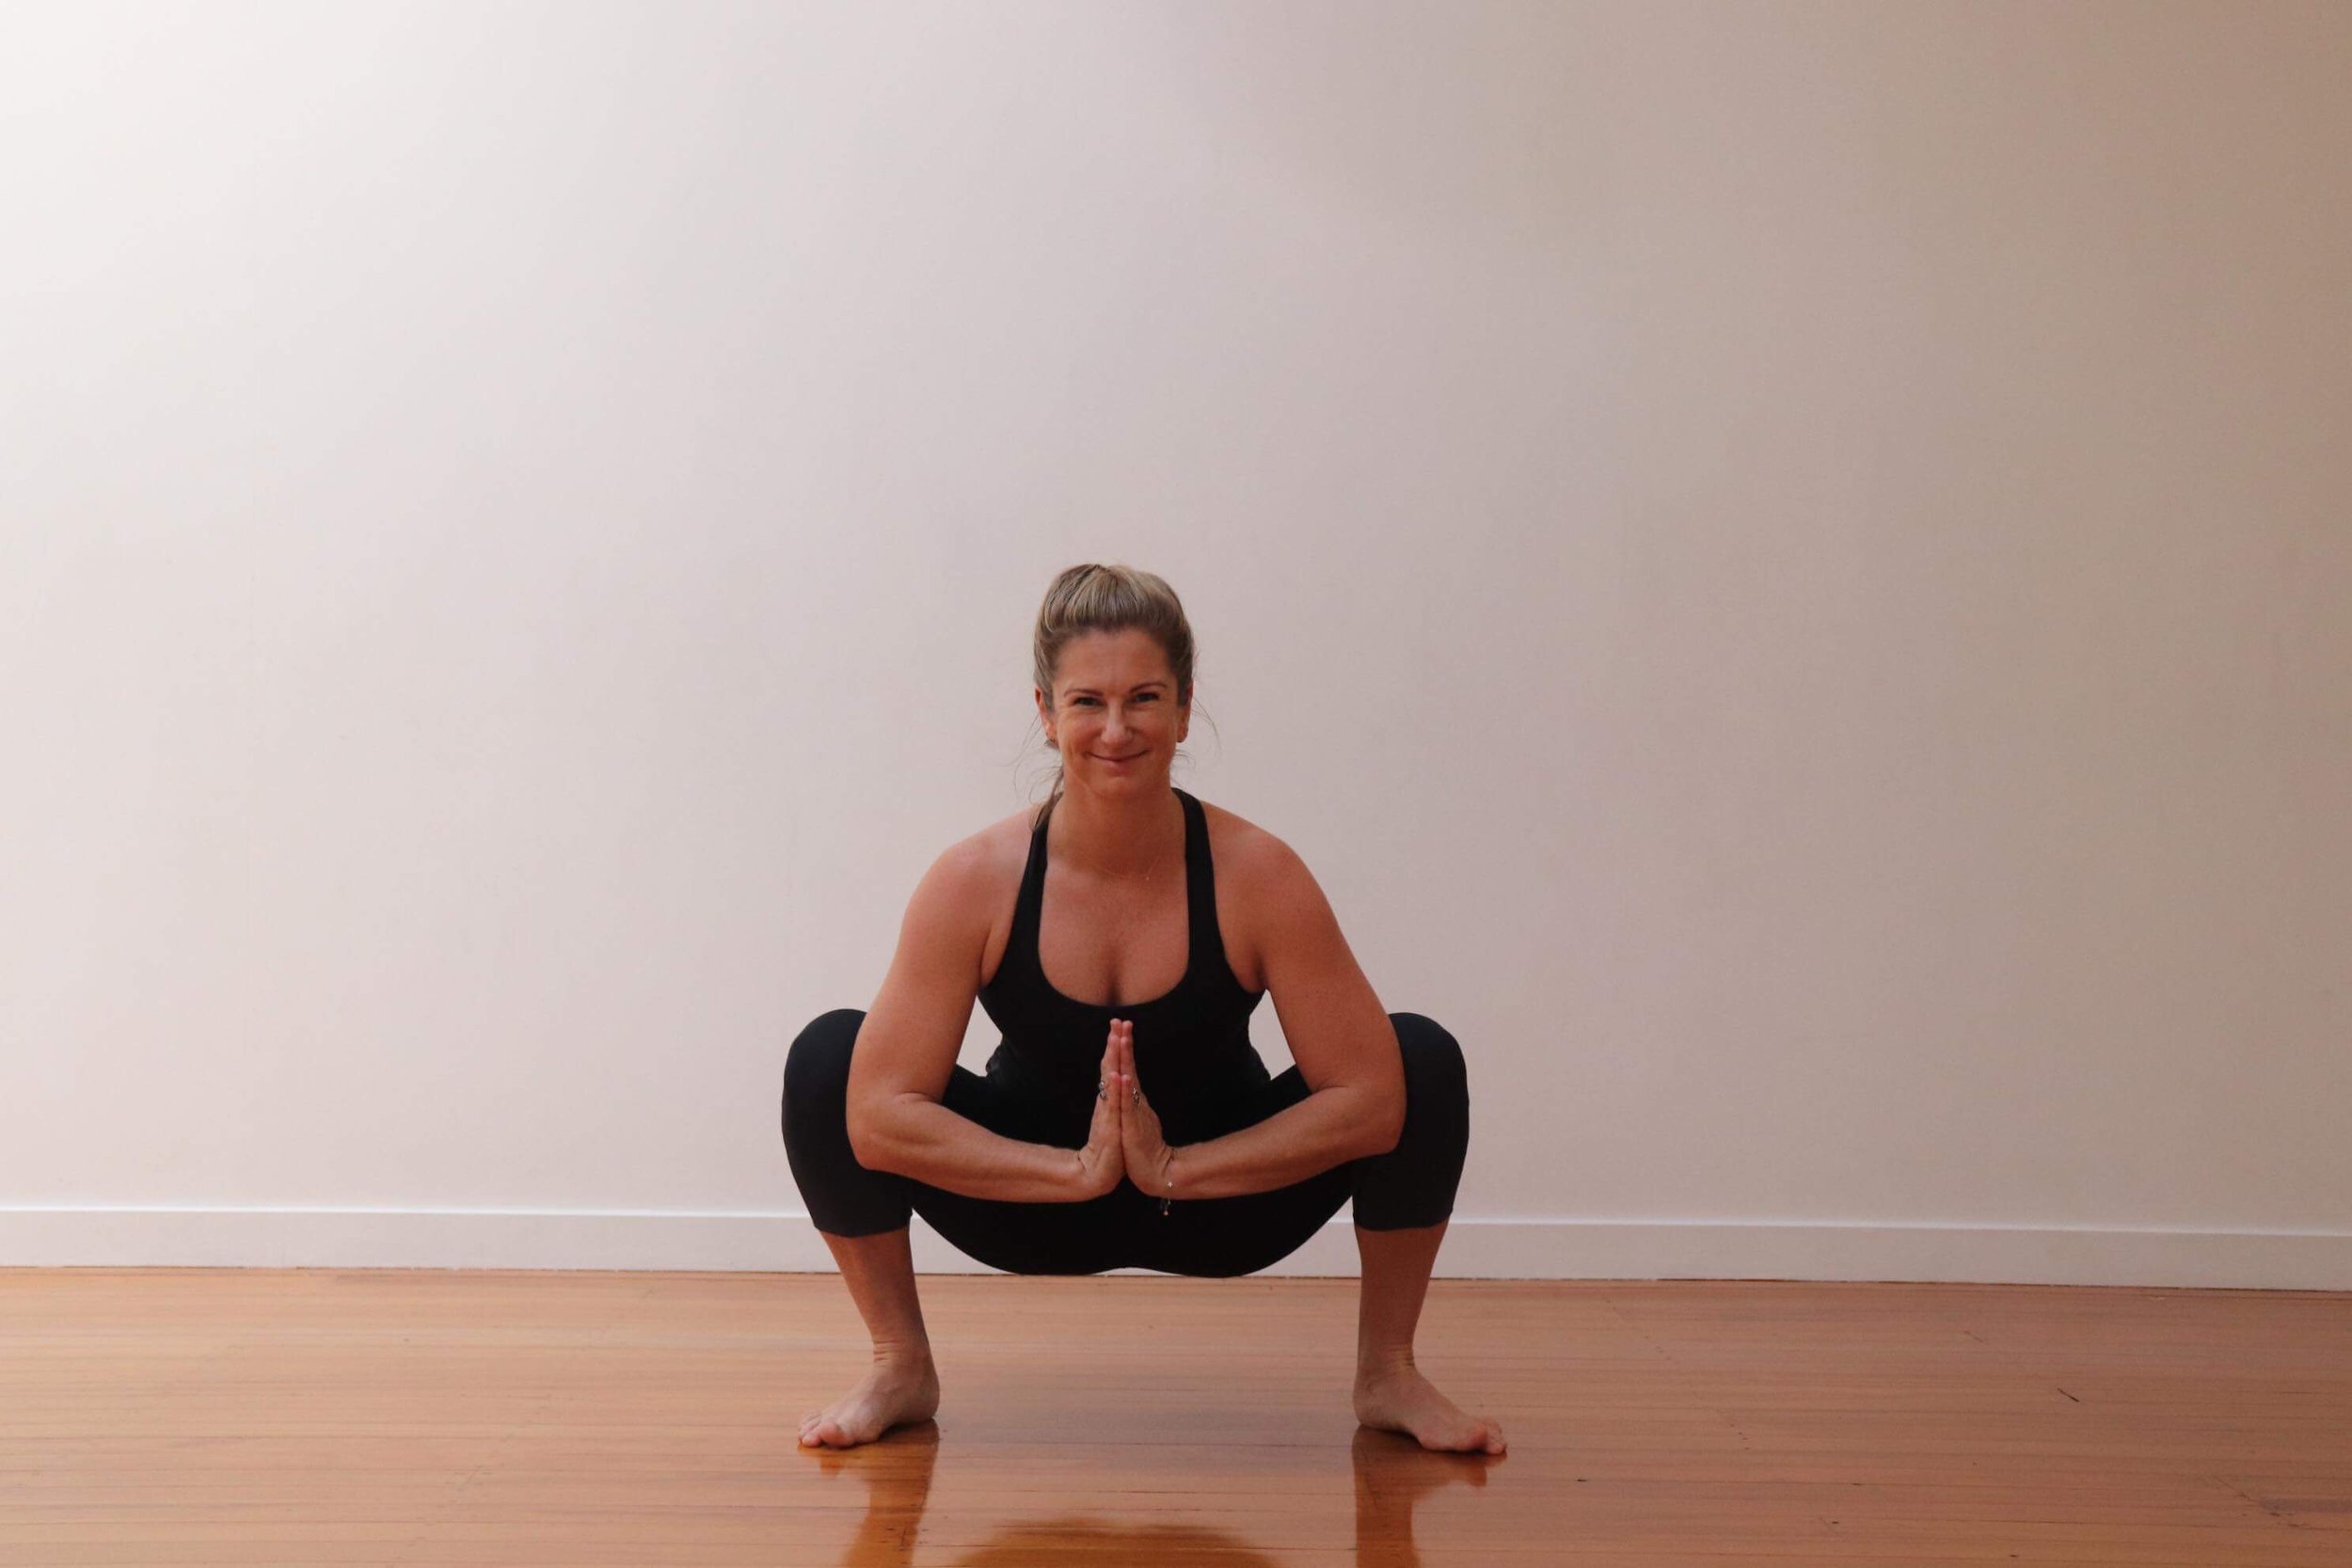
If that feeling of dread washes over you when the yoga teacher says "just bend your knees and come into a deep yogi squat" you find yourself glancing sideways, comparing how 'easy' it looks for some people yet it feels awful in your own body, then this post is for you!  Often our challenges in life present the greatest opportunities for learning, and Malasana or Garland pose can offer us much valuable insight into ourselves. Some yoga asana are more gymnastical and some are highly functional, the deep squat is highly functional, so we want to do it, yet it's a complex pose that involves many joints and muscles.  Depending on your body proportions,  joint structures, areas of tension, areas of mobility, strengths and weakness the answers will be different. The great news is, that Malasana is a great place to help identify some underlying issues in the body and become curious about these complex workings.

You're one of a kind baby, there's no one quite like you!

“Differences aren't deficits,” said population geneticist Theodosius Dobzhansky.

The truth is everyone’s squat will look a little different due to anatomical variations of the hip joint. Some of these variations are skeletal, and no amount of yoga practice or hip opening can change the shape of this bony architecture, at least not significantly, so Malasana can also become a seat for radical self acceptance!  With consistent and safe practice, your squat may change shape as your soft tissues change, so let us not be limited by our anatomy and instead let's get in and explore things a little more.  Squatting is a functional movement so if we don't use it, we will likely loos it!  Think how many times a day you squat, getting up out of a chair or off the floor, stepping out of the car, or going to the bathroom!  Yet in the western culture a deep squat isn't part of our daily life unless we make it one, I know as I age I want to be able to get down on the floor and play with my grandchildren!  Learning about your body and how to come into deep squat honouring your own architecture, will undoubtably help your movement patterns and posture. 

IMG_0880.JPG

Whats involved?

So I said it was complex so bear with me here if anatomy isn't your jam!  The ability to perform the deep squat requires appropriate closed-kinetic chain (weight-bearing) dorsiflexion of the ankles; knee and hip flexion; combined movement of the lumbar spine (lower back) and the pelvis; axial extension (lengthening) of the spine; and slight shoulder flexion.  Malasana challenges the mechanics of the whole body to work cohesively together, no wonder it can go south (literally... who feels like they are going to fall backwards?)  it requires mobility and stability in the ankles, knees, hips, pelvis, and spine.  

Natural tendencies

Just the way you are, is perfect, however understanding how your body proportions affect a pose is a golden key for unlocking compassion and understanding in our practice. Those with long torsos and/or short legs will likely find malasana to be a little more accessible, while those with shorter torsos and/or longer legs may have to work a little smarter and longer to find a 'comfortable seat' in Malasana.   Taking the time to examine Malasana closer, we can begin to assess bilateral symmetry in the ankles, knees, hips, shoulders and spine.  Also observing our own ROM and where we may benefit from the use of props and how to use them. 

Try the pose

Use a mirror or film yourself on your phone so that you can look, assess and start to awaken your inner teacher.  Begin with your feet a little wider than hip distance and perhaps start with the feet slightly turned out. Keeping grounded through the big toes, start to bend the knees and begin to lower down, as you lower down drive your knees out wide, while keeping the big toes pressing down.  Your heels might lift a bit (we will look at that a little later) but try to keep them down as best you can.  You can bring the elbows inside the knees or inner thighs, or reach out and take hold of your mat in front. You might feel like you're going to topple over backwards, or you might end up on your bum, but we'll look at what that can mean later too!

Observe

How do you feel?  Are your heels lifting?  Look at your arches, are they collapsing? Are your ankles rolling in, or knees knocking in? Is one side more collapsed or heavy that the other?  Are your toes excessively turned out?  Are your knees tracking over your feet? How do you feel in your hips?  Then look form the side, is your spine straight, rounded or arched?  Is your tail tucked under? Where is the weight landing?

Start from the ground 

Feet and ankles

In asana we always begin from the base, take a look at your feet and ankles.  Do your heels want to lift up?  The simple answer here is usually restriction in the soft tissues of the calf, the chillies tendon and more specifically the soleus muscle (deeper lower calf muscle) because the knee is flexed (bent) in this position.  These tissues can be released with trigger point release balls, a massage therapist and also strengthened with isolated exercises.  Sometimes in an effort to get the heels down the medial (inner) arch collapses and/or the feet turn out excessively.  This can be an indicators of tightness in the upper hamstrings and piriformis muscles (deep external rotator of the hip)  and/or weakness in the gluteus medius muscle.  

Malasana also requires the ankle to dorsiflex, the functional ROM (range of motion) here is 20 degrees and for this action to occur the talus bone (caged bone in the ankle with no muscular attachments) needs to glide posteriorly (backwards) as the foot moves towards the shin.  This is a less common culprit but if there has been injury or compression in this area, you may benefit from talus mobilisation exercises to help increase ROM in the ankle.

Knees and hips

So how about the knees, are they knocking inwards?  This can indicate weak gluteus muscles, tight adductors (inner thighs) and/or tight iliotibial band (the band of fascia along the outside of the leg). If your low back arched excessively (particularly as you lowered down), you may have tight hip flexors that are compensating for a weak core. If your spine rounded forward, you may have weak erector spinae muscles, a tight thoracic (middle) spine, and/or tight hamstrings.  So what is your body trying to tell you here?  More posterior chain (back body) strengthening, just think how much of your day is seated!

Asymmetry 

Leaning toward one side, one knee dropping in or one hip higher than the other, can indicate stability issues, asymmetrical ROM in ankles, knees or hips or a protective mechanism that the body has created to avoid pain. This is common in people who've have injuries or impingement in the lower body.  This can be seen more clearly in video or photos as it is likely that if the body has been in this pattern for a while, you can't feel it.

So what do we do?

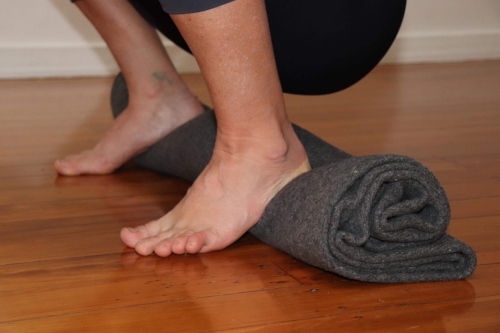
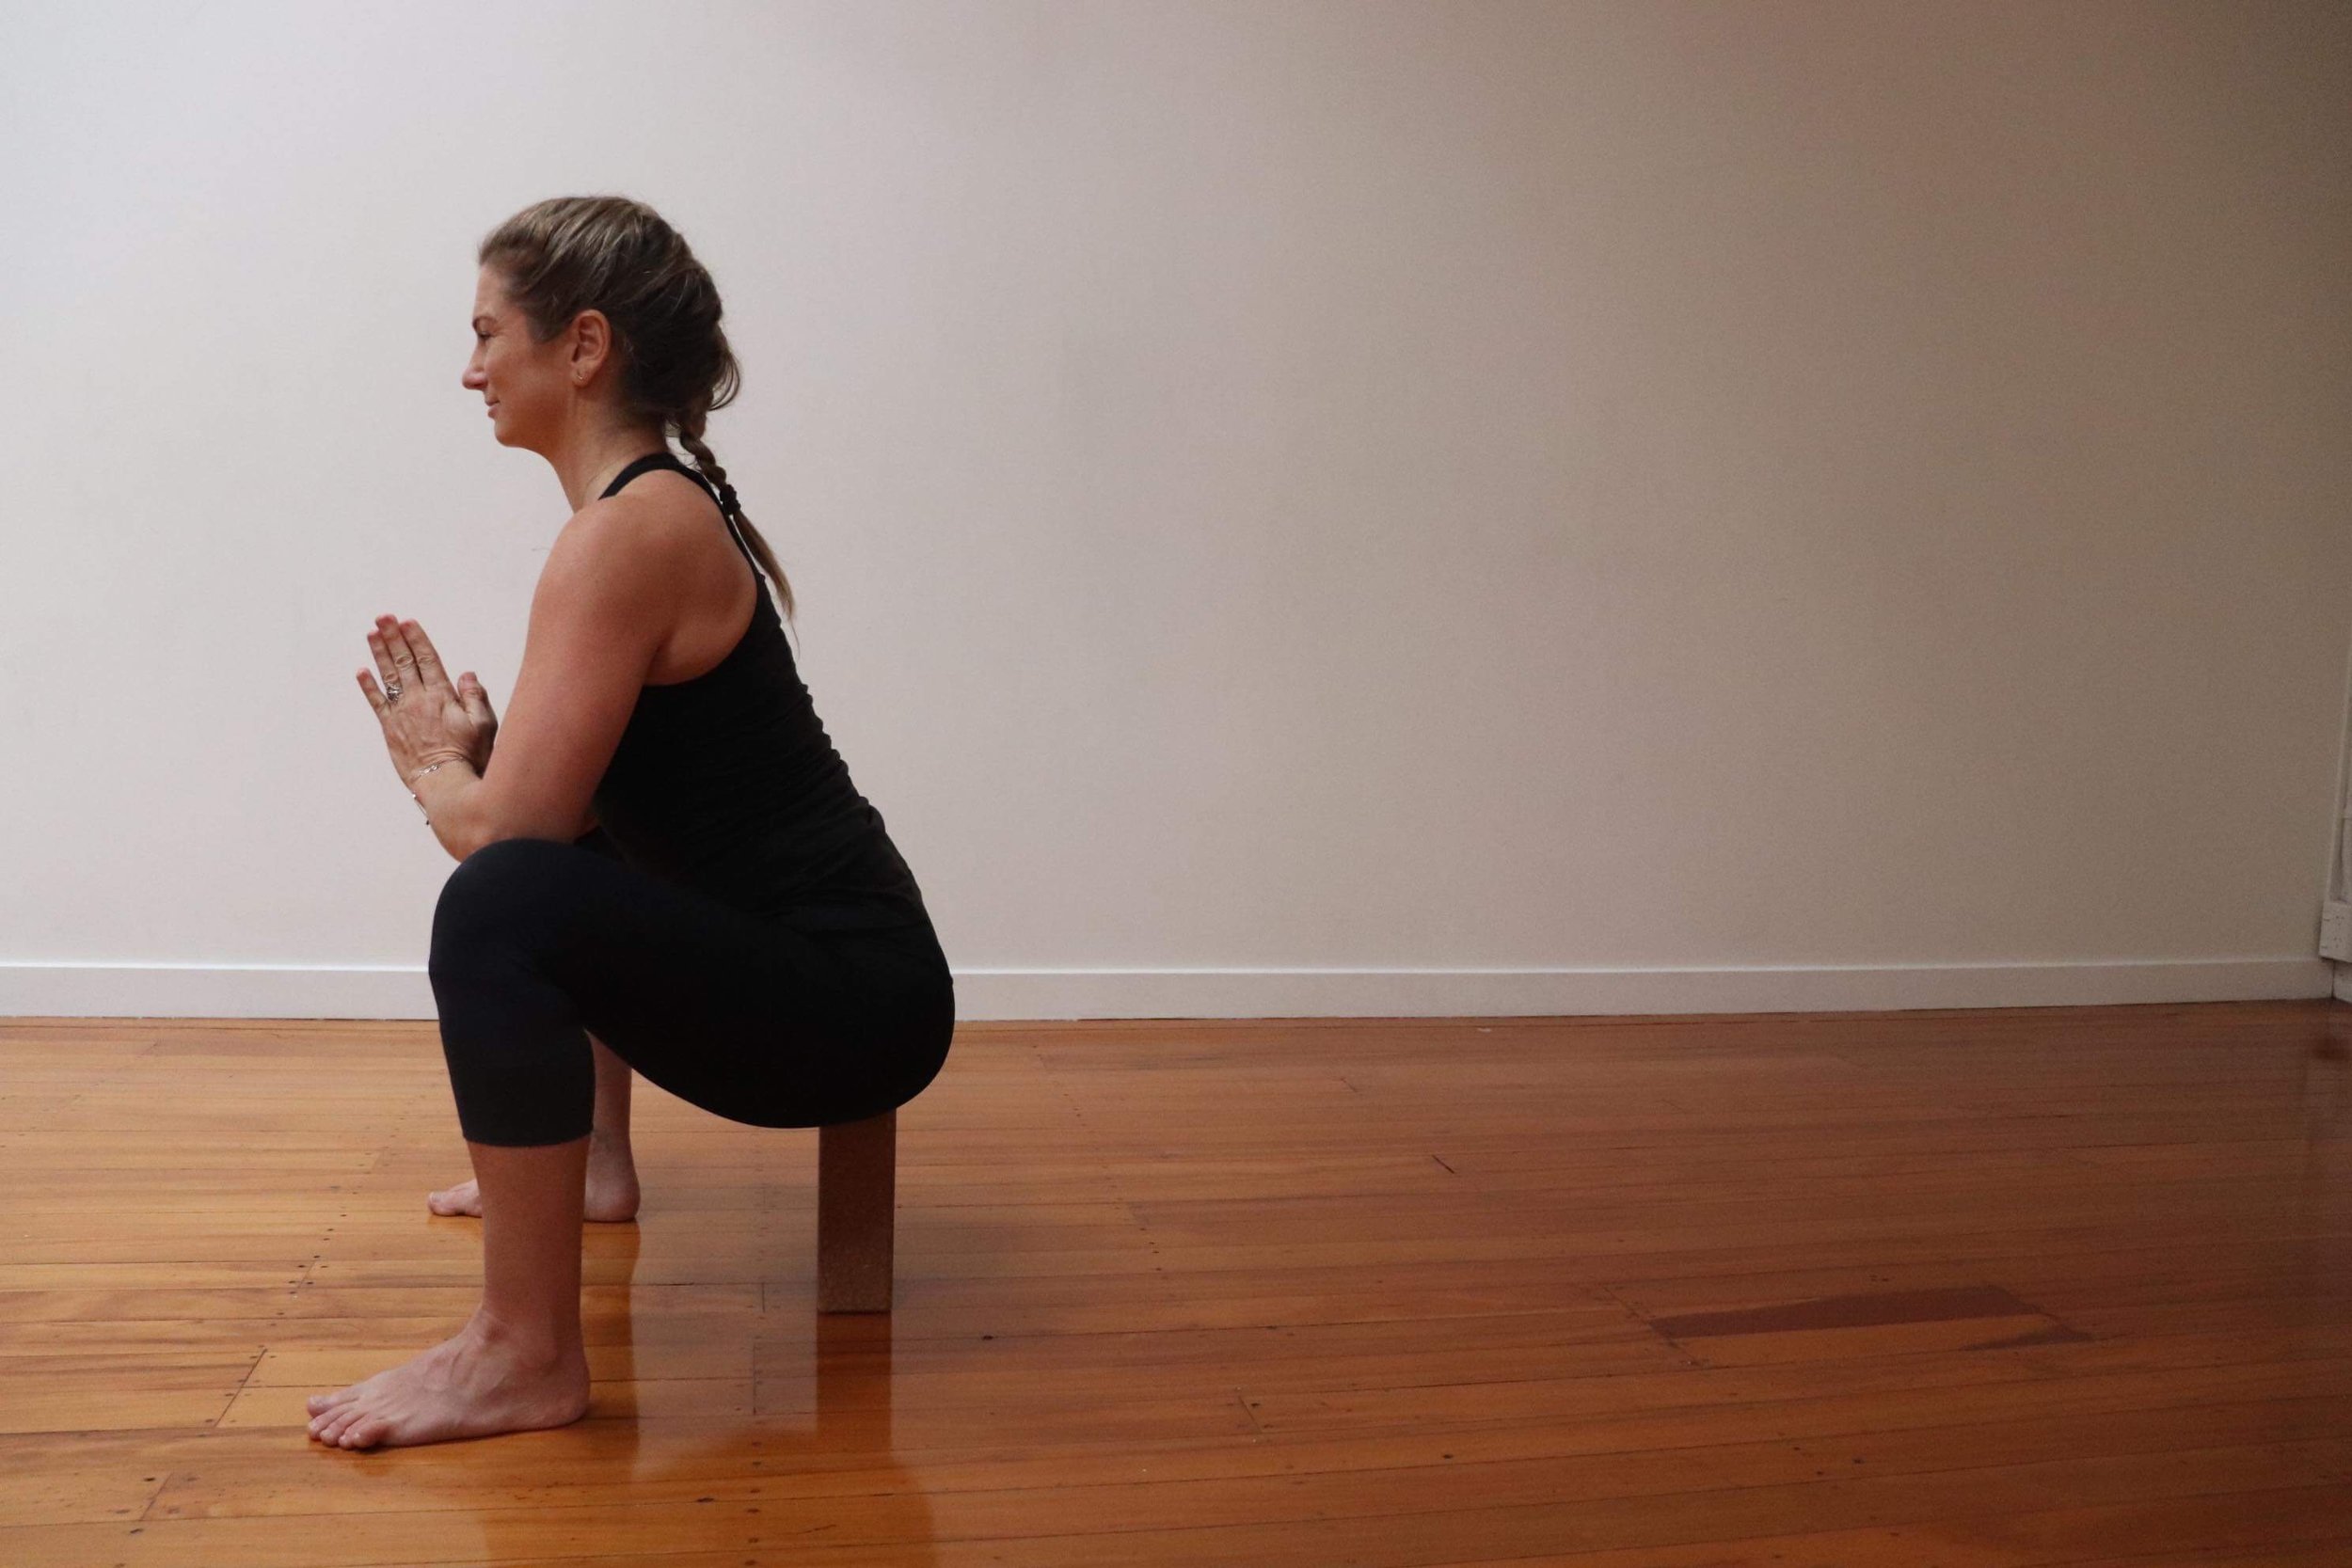
The easiest way to make this pose more accessible is to place support underneath the heels (such as a rolled up towel, your mat, a yoga wedge or blanket). If your heels are really close to the ground, try widening your feet a bit more and/or turning your toes out a little more, and see if that helps bring your heels down, but don't collapse the arches!!!. Your own unique structure and where your hip socket is positioned will affect your positioning, try taking the feet wider, how does that feel?  How does it feel with the feet more parallel?  If ROM in the knees or ankles are an issue try sitting on a block or move to a wall for light support, if you take this option keep as much weight as possible in the feet so that it stays active and you receive the benefits from the pose rather than just sitting in it!  Aim to keep your knees in line with the feet and keep pressing your big toes firmly into the ground.  As your body changes so too may your Malasana, some days my feet feel good parallel other days I need more turn out. 

IMG_0915.JPG
IMG_0914.JPG

Other things to try

So you've got the heels down now on the floor or support, make sure to keep your big toes pressing down while you drive the knees outwards and weight towards the outer edge of the foot.  This keeps the gluteal muscles turned on and helps

  • Your ankles and feet stay in a better position, providing a solid foundation.
  • Your knees pointing in the same direction as the feet, not twisting inwards.
  • Your hips are externally rotating and creating a little torque in the hip sockets.

The strong foundation of the feet creates pada bandha (root lift from the soles of the feet) helping further up the chain to lift the pelvic floor and lower abdominals (mula bandha and uddiyana bandha). Use the elbows to press the knees out, while simultaneously hugging the knees in to the elbow, to lift the spine upwards  and draw the chest forward.  This action engages the upper back muscles and 'untucks' the tailbone, feel how this lifts the rib cage and diaphragm, allowing a more spacious sensation into the torso.  Soften the chin and lengthen the back of the neck.

If you hold this pose for a while, you may experience sensation in the frontal shin muscles (tibialis anterior) these muscles work against the release of the calves to help stop you from falling backwards.  Don't despair, come out when you need to and build up time in the pose slowly, as these muscles strengthen and the calves release, it will become more of a comfortable seat.

If you are still toppling backwards you can hold onto your mat, move to a wall or practice at home holding on to a strong table leg to improve the ROM in the required joints.  Don't give up, as we age this is a functional movement that we want to maintain.  As it gets easier with practice you may even find yourself stopping, dropping and squatting throughout the day!